But is good with other versions.
******************************************************************
Materials:
pngwing.com.png
ec5b6b54-animabelle.jpg
1Happy_2023.PspSelection
2Happy_2023.PspSelection
femmes_0349_lisat.png
WordArt_Pngtree_2023_Gold.png
******************************************************************
Plugin:
Plugins - dsb flux - Bright Noise
Plugins - Flaming Pear - Flexify 2
******************************************************************
color palette
:

******************************************************************
methode
When using other tubes and colors, the mixing mode and / or layer coverage may differ
******************************************************************
General Preparations:
First install your filters for your PSP!
Masks: Save to your mask folder in PSP, unless noted otherwise
Texture & Pattern: Save to your Texture Folder in PSP
Selections: Save to your folder Selections in PSP
Open your tubes in PSP
******************************************************************
We will start - Have fun!
Remember to save your work on a regular basis
******************************************************************
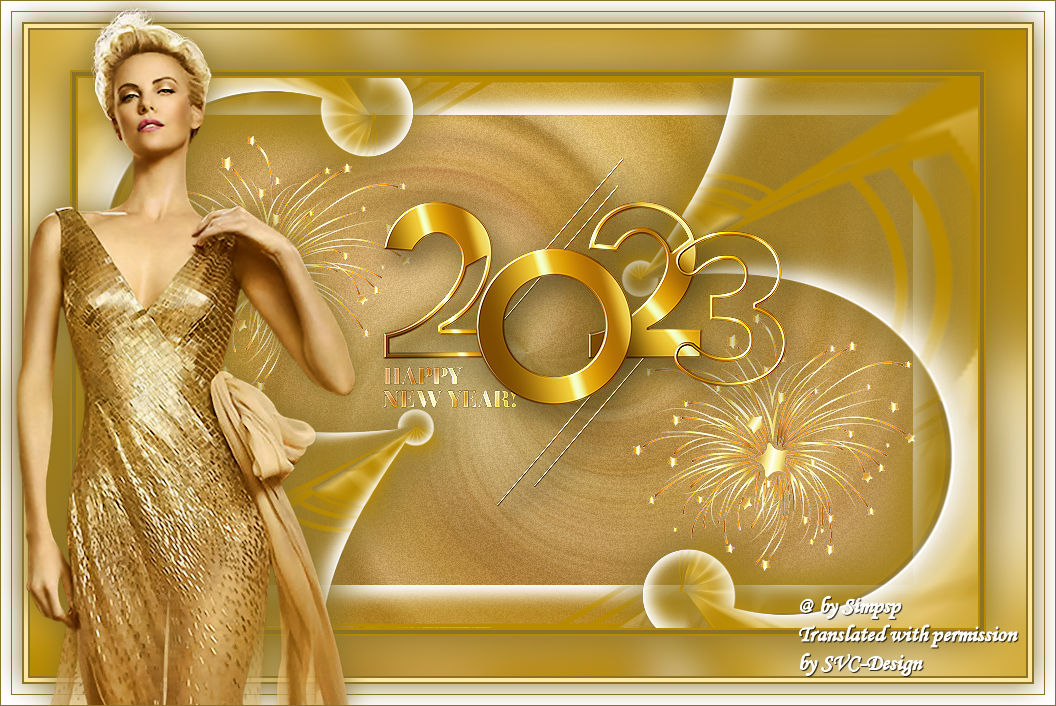
1.
Choose four colors to work with.
01Foreground: #b88a00
02 Background: #ffe79f
03 Extra: #8b7229
04 Extra: # FFFFFF
2.
Open a new transparent image of 900X550px
3.
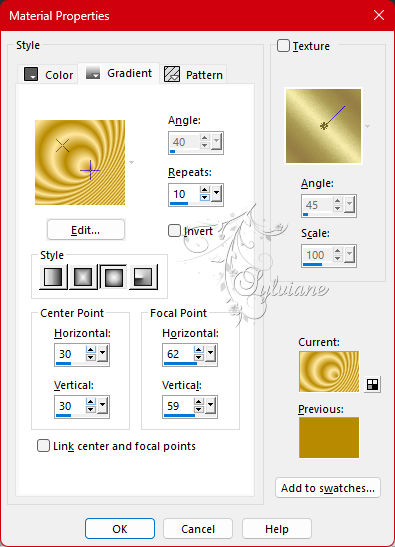
Fill - Sunburst > Gradient.
4.
Open femmes_0349_lisat.png
Edit - Copy
Selections - Select All.
Edit - Paste into selection.
Selections - Select None.
5.
Effects - Image Effects - Seamless Tiling: Default
6.
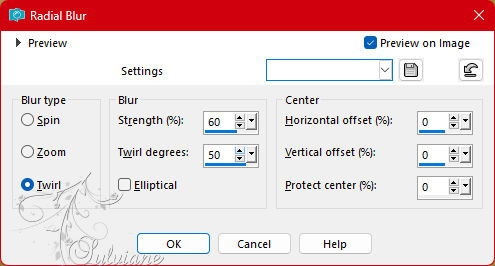
Adjust - Blur - Radial Blur.
7.
Adjust - Sharpness - Sharpen.
Layers - Duplicate.
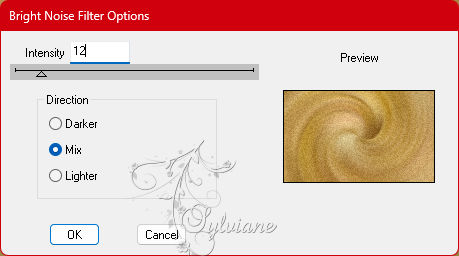
8.
Plugins - dsb flux - Bright Noise.
9.
Layers - New Raster Layer.
10.
Fill with : #b88a00 (Foreground).
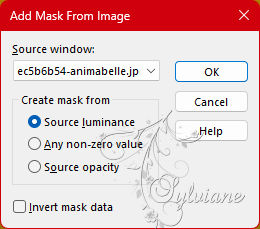
11.
Layers - New Mask Layer - From Image.
Layers - Merge - Merge Group.
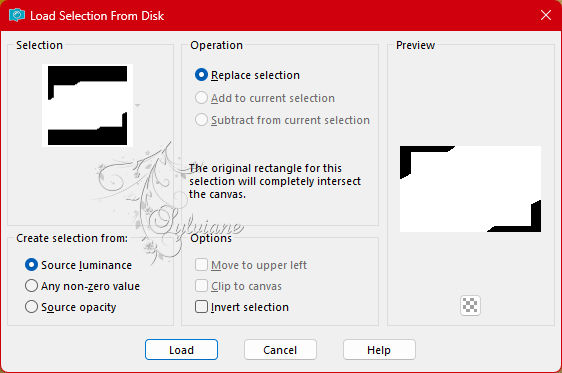
12.
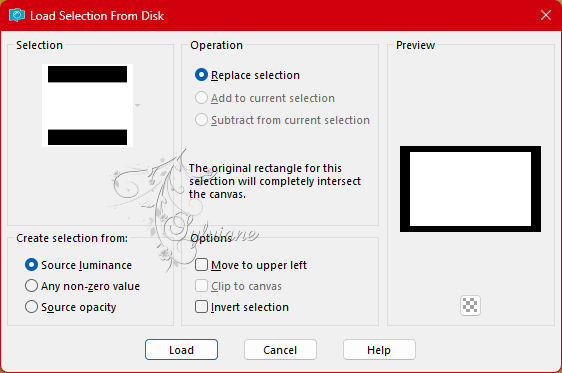
Selections - Load/Save Selections - Load Selection From Disk - 1Happy_2023
13.
Selections - Invert.
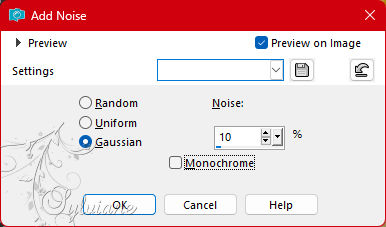
14.
Adjust - Add - Remove Noise - Add Noise.
15.
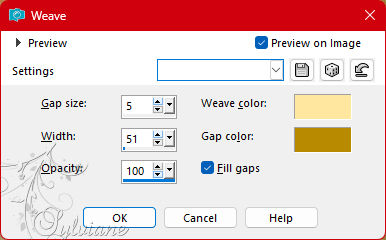
Effects - Texture Effects - Weave.
16.
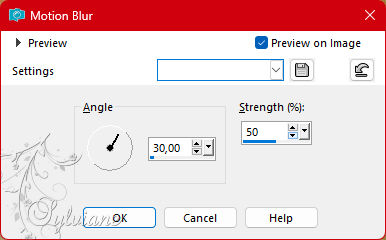
Adjust - Blur - Motion Blur.
17.
Effects - 3D Effects - Drop Shadow -
6/6/100/60 - Color: #8b7229
18.
Selection - Select None
19.
Selections - Load/Save Selections - Load Selection From Disk: 2Happy_2023.
20.
Effects - 3D Effects - Drop Shadow
6/6/100/30 color: #ffffff
Repetir dropschadow (V: -6 / H: -6).
21.
Selection - Select None
22.
Layer - Duplicate.
23.
Layers - Merge - Merge Down.
24.
Layer - Duplicate.
25.
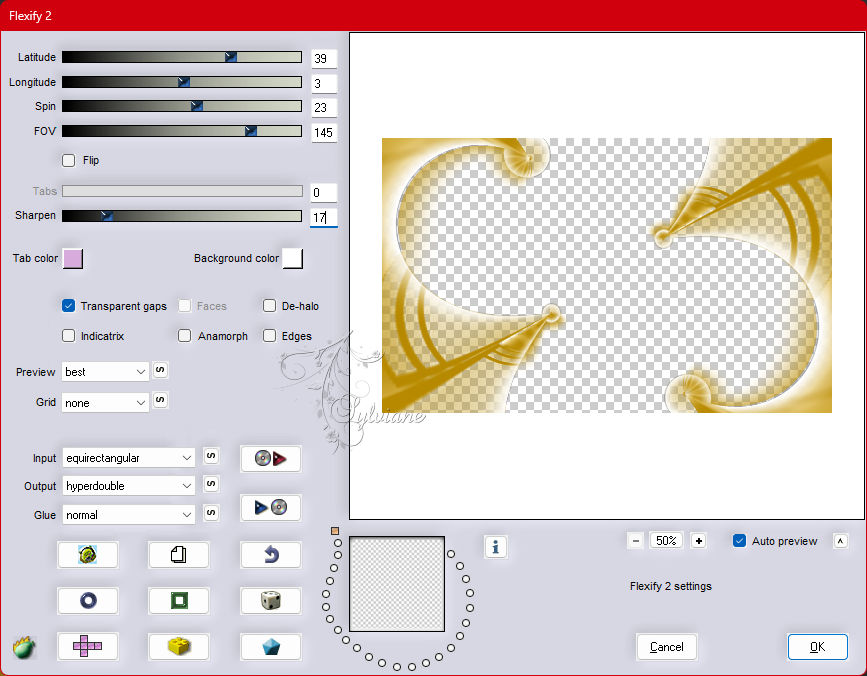
Plugins - Flaming Pear - Flexify 2
26.
Effects - 3D Effects - Drop Shadow -
2/2/100/60 - color: #8b7229
Repetir dropschadow (V: -2 / H: -2)
Layers - Merge - Merge Down.
27.
Open pngwing.com.png
Edit - Copy
Edit - Paste as New Layer.
Image - Resize - 45%
Adjust - Sharpness - Sharpen.
28.
Activate selection tool (Press K on your keyboard)
And enter the following parameters:
Pos X : 49 – Pos Y : 58
Press M.
29.
Layers - Duplicate.
30.
Activate selection tool (Press K on your keyboard)
And enter the following parameters:
Pos X : 554 – Pos Y : 236
Press M.
31.
Layers - Merge - Merge Down.
32.
Open WordArt_Pngtree_2023_Gold.png
Edit - Copy
Edit - Paste as New Layer.
Image - Rezise - 40 %
Adjust - Sharpness - Sharpen.
Edit - Repeat Sharpen.
33.
Activate selection tool (Press K on your keyboard)
And enter the following parameters:
Pos X : 292 – Pos Y : 74
Press M.
34.
Effects - 3D Effects - Drop Shadow
2/ -2 /100/60 - Color: #8b7229
35.
Layers - Merge - Merge Down.
Check the positions of the layers:
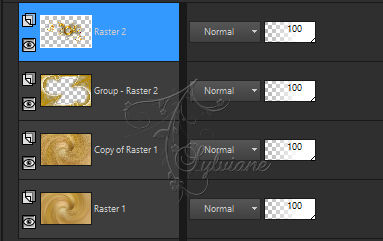
Close the visibility of Layer Raster 1.
Layers - Merge - Merge Visible.
36.
Open and activate Layer Raster1.
Edit - Copy special - Copy merged
37.
Image – Add Borders –symmetric - 2 px > cor (01): #b88a00 (Foreground).
Image – Add Borders –symmetric - 4 px > cor (03): #8b7229 (Extra).
Image – Add Borders –symmetric - 2 px > cor (01): #b88a00 (Foreground).
38.
Selections - Select All.
Image – Add Borders –symmetric - 40 px - any color.
Selections - Invert.
Edit - Paste Into Selection.
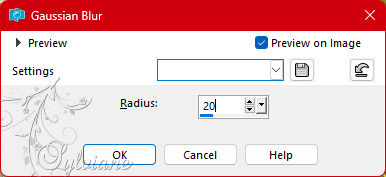
39.
Adjust - Blur - Gaussian Bur.
40.
Selections - Invert.
41.
Effects - 3D Effects - Drop Shadow
0/0/100/60 - Color: #8b7229
Selections - Select None.
42.
Image – Add Borders –symmetric - 2 px > color: #8b7229 (Extra).
Image – Add Borders –symmetric - 4 px > colr: #ffe79f (Background).
Image – Add Borders –symmetric - 2 px > color: #8b7229 (Extra).
43.
Selections - Select All.
44.
Image – Add Borders –symmetric - 10 px > color: #fffffff (Extra).
Image – Add Borders –symmetric - 1 px > color: #8b7229 (Extra).
Image – Add Borders –symmetric - 10 px > color: #fffffff (Extra).
45.
Effects - 3D Effects - Drop Shadow
0/0/100/40 - color: #8b7229
46.
Selections - Select None.
47.
Open the main tube.
Edit - Copy
Edit - Resize: 85%
Adjust - Sharpness - Sharpen.
Drop Shadow to your liking.
Position to your left.
48.
Image – Add Borders –symmetric - 1 px - color : #8b7229
49.
Apply your watermark or signature
Layer – merge – merge all (flatten)
Save as JPEG
Back
Copyright Translation 2023 by SvC-Design